During the pandemic, a lot of beauty parlors ended up closing for a while, which ended up forcing me to take care of my own eyebrows, but I didn’t have access to any wax strips at the time.
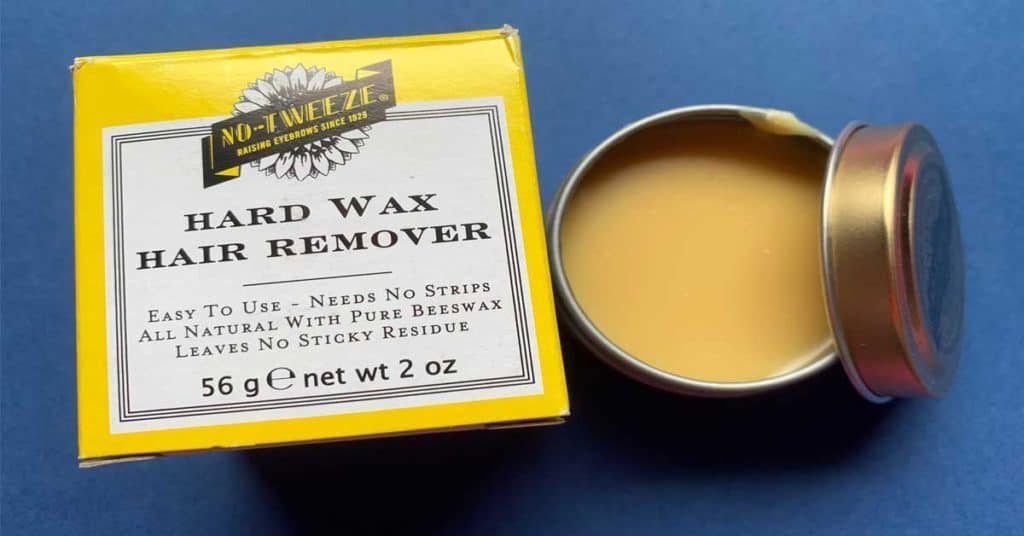
So how did I wax my eyebrows without using any wax strips? Instead, I used Hard wax, this doesn’t require any wax strips at all, once you have applied the wax to the skin it will harden over a period of time, this will usually take about 1-4 minutes, which you would then just simply pull the wax off in a similar way as a wax strip, and the eyebrow hairs would simply come off, and your eyebrow would be looking clean and in shape.
There are a few ways that the hard wax comes in, the first way is by requiring the wax to be heated, which can be done with your microwave, Just simply heat the wax for about 4-5 minutes. The second way is by using wax beads, this would require a wax warmer where it is placed into the container and lets the wax melt.
What Can You Use Instead Of Wax Strips
There are other alternatives when it comes to removing your hair, rather than using wax strips you can use hard wax, which is what I tend to use, it works just as well as wax strips do.
Hard wax is also referred to as non-strip wax, peelable wax, film wax, and even hot wax. This has changed over time, the old traditional way was that the hot wax would be applied in a thick layer, or you would build up several layers to ensure a thorough coating and that you have covered the area well.
The wax is then left to cool on the skin, as it cools down the wax will harden and wrap itself around the eyebrow hairs to which you can then just simply remove the wax by hand while taking the hair with the wax.
Below is a table of the ingredients for Hard Wax:
| BASE | ADDITIONAL |
| Beeswax | Emollients (Lanolin, Vegetable/Mineral oil) |
| Rosin (Treated Pine Resin) | Thickeners (Paraffin) |
| Microcrystalline (Derived From Petroleum) | Fragrance & coloring agents (tea tree, lavender, rose, and chamomille) |
Hard wax is also available in diskettes, bricks, and pellets this helps when you are melting the wax itself so that you don’t heat up to much wax then you actually need, but it allows you to top up if you need to.
1.Prep The Skin
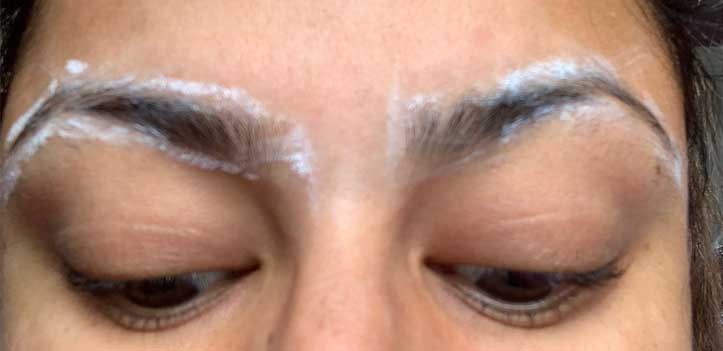
The first thing to remember is to prepare the skin before you start waxing, you have to make sure that the skin isn’t oily. The reason you don’t want your skin to be oily is that it will be difficult for the hard wax to grab onto the hairs, so it’s best not to have any moisturizer or makeup on the skin.
If you suffer from oily skin then it’s best to blot off any excess oil off the surface of your skin with blotting paper. If you are worried about your skin ripping off because of the wax, another trick is prepping your skin by applying some talcum powder onto the surface of the skin.
This will act as a second barrier of skin so that your own skin won’t graze. It can also work well with oily skin types to help absorb any excess oils, it’s also best to keep your skin clean so that no makeup gets into the pores of the skin during waxing otherwise this could cause your skin to break out.
2. Shape The Eyebrows
When it comes to shaping the eyebrows it’s important to create a frame for them, this should give you an idea or a guide to the kind of shape you are looking to create.
There are three main points to map out on your eyebrows:
Point A: Which is the beginning of the eyebrow. This should be the thickest part of the brow, to determine the beginning of the eyebrow you will need a pencil or even something that is the size of a ruler and straight. As you will be using this to place vertically so that it will help you measure this point. The stick should connect the side of the bridge of the nose, to the inner corner of the eye. This will locate the beginning of the eyebrow.
Insider Tip: Always use the bridge of the nose as a marker.
Point B: In order to locate the arch of the eyebrow look straight ahead and join the bottom of the bridge of the nose to the outer edge of the pupil. The stick should cross your brow which will give you the ideal place for where the arch is. You want to be able to draw an equal sign for the top part of the arch along with the bottom part of the arch.
Point C: This is where the end of the eyebrow should be located. In order to locate the end of the eyebrow join the bottom of the bridge of the nose with the outer corner of the eye, wherever the vertical stick hits are where the eyebrow will end.
Once these three points are located this will help you figure out the frame of your eyebrow.
Insider Tip: If you are looking to make your eyebrows thinner always make sure that you remove hair from the bottom frame of the eyebrow.
3. Comb And Trim The Eyebrows
Before the actual waxing process begins make sure that you give the eyebrows a bit of a trim.
For this step, you will need a spooli and a pair of eyebrow scissors. Use the spooli to brush upwards, if there are any eyebrow hairs that are coming out of the eyebrow frame then it means that these hairs need to be trimmed.
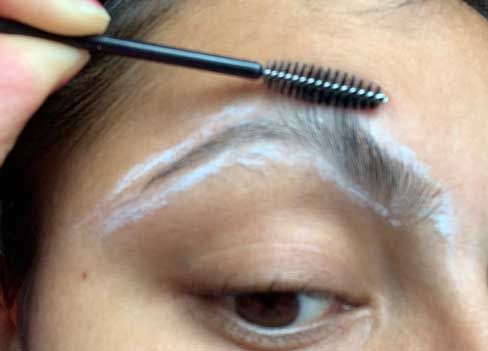
Once that’s trimmed use the spooli to comb the hairs downwards and whatever hair comes out of the eyebrow frame then that should also be trimmed. By trimming long hairs it prevents any hairs from getting in the way and accidentally being removed. Trimming the eyebrow hairs also keeps the shape of the brows well-trimmed and defined.
4. Waxing The Eyebrows
Always make sure that you have clean hands before starting to wax your eyebrows, this way no germs or bacteria will get into the pores which will help prevent any future breakouts after you wax. The warm wax will open up the pores on the skin which allows the hair to easily be removed.
When it comes to waxing the eyebrows there are a few things to consider before applying the wax to your skin.
Setting The Right Tempreture
The first thing you should consider is getting the wax to the correct temperature. The reason for this is because you need the wax at the right consistency to be able to pull out the hairs from your skin.
What I personally do is I put the hard wax on the highest heat setting on my wax warmer and wait for the wax to become runny like a liquid consistency. This will ensure that the wax has melted, you don’t want to use the wax in this state because it will be way too hot and will burn the skin.
Once the wax is in a liquid form I turn down the heat with the wax warmer so that it cools down. The wax should be left on a medium setting for approximately 5-10 minutes, you will then notice the consistency of the wax becoming somewhat thicker like a stickier consistency.
Once your able to obtain this consistency then test the actual wax on the inside of your wrists. If it’s too hot then it means the temperature on the wax warmer needs to be turned down so that it reduces the heat.
When the temperature on the wax feels warm and doesn’t feel too hot on the wrist then it means this is a good consistency. You don’t want the wax being too thick because it won’t grab the little baby hairs around the eyebrows.
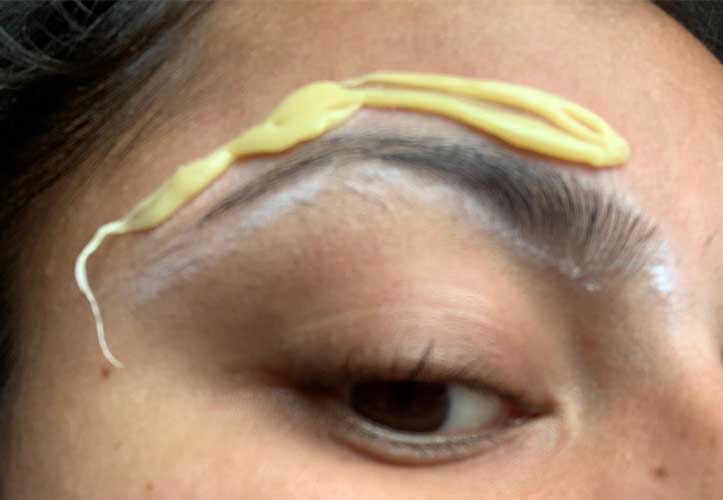
Once you’ve got the correct consistency to proceed to apply the wax on the outside of the frame of your eyebrows. Use a thin wax stick to apply the wax on the outer frame on top of the brow. Make sure that the wax is applied in the direction of the growth.
Let the wax cool and become somewhat hard, It’s important to stretch the skin and pull the hard wax in the opposite direction. When doing the bottom part of the frame make sure to place the wax on the outer frame. Once the wax has hardened proceed to lift off the hard wax and pull it off against the opposite direction of the hair growth.
Applying The Wax To The Skin
When it comes to applying the wax to the eyebrows make sure you use a thinner wax spatula. I personally use a disposable cuticle stick, I found that this is the best way to apply wax in small areas in order to get the best detail for hair removal. I usually don’t apply the wax too thin instead I apply it somewhat thicker so that I can mold the wax around the preferred shape, this usually gives me more definition around the eyebrow frame once the wax is removed.
Always make sure you stretch the skin around the eyebrow were you going to pull off the hard wax. This will prevent you from ripping off the skin and will prevent any bruising.
Another tip to consider is when the hair is freshly removed try to apply pressure with your finger where the hair was removed because this will help prevent that stinging feeling, it will calm the skin down right away.
Insider Tip: Again it’s important to have clean hands for this to prevent any breakouts.
5. Tweeze Any Extra Hairs
Sometimes there are some stubborn ingrown hairs that are hard to remove after you wax. These are the most stubborn of hairs, which can be annoying.
The best way to remove ingrown hairs is by using a tweezer to pull them out individually, also, to further ensure that the eyebrow shape is maintained correctly. Make sure that any extra hairs that are outside the eyebrows frame are removed, this will keep the eyebrows looking very neat.
When tweezing the eyebrows make sure you pull out the hairs according to the direction of the hair growth this will prevent any ingrown hairs in the future.
6. Cleanse And Soothe The Skin
Once you are done with the waxing make sure that you cleanse the skin with witch hazel. Witch hazel acts as a natural anti-skeptic, It will help tone the skin and soothe it from all the hair removal. The great thing with witch hazel is that it will deep clean the pores, and condition the surface of the skin which will help prevent any breakouts.
If you want to soothe the skin, then another option is rubbing some ice on top of the skin. This will help calm the sting and redness down. The purpose of the ice is to help close up any pores that are open so that germs and bacteria don’t plant themselves in there.
Another great alternative to help soothe the skin is by applying fresh aloe vera on the skin. This plant has anti-inflammatory properties that help condition the skin and helps it become softer.
Do’s And Dont’s Of Waxing
Do’s
- Wash your hands before starting your waxing procedure to prevent germs from spreading.
- Make sure you have the correct lighting so that you can see what you doing, I suggest using natural lighting so that you can see every single hair being removed.
- Test the wax on your wrist to see if the temperature is right for you.
- Always apply wax in the direction of the hair and remove wax in the opposite direction of hair growth.
- If you have sensitive skin apply some talc powder around the skin so that the wax doesn’t remove an extra layer.
- Always blow on the wax before applying to the skin so that the temperature isn’t too hot.
- Clip your hair back, make sure your hair isn’t in the way during waxing.
- Stretch the skin before removing the wax, this will help prevent the skin from bruising and ripping.
- Have some baby oil and coconut oil at hand in case wax gets on your eyelashes or inside your eyebrow frame. Oil is a great way to remove hard wax in unwanted areas.
- Use a natural antiseptic such as witch hazel or fresh aloe to help soothe the skin after the hair removal.
Don’ts
- Wear makeup during waxing before or after waxing. Keep the skin clear of any makeup because this will affect the way your hair will be removed. After the hair removal doesn’t apply any makeup to the skin because it can get into the pores and can clog them.
- Don’t apply any oils to the skin before waxing.
- Don’t wax on top of broken skin, blemishes, or warts.
- Don’t apply wax to your actual eyelid because the skin is thinner on this section of the face. If you do accidentally get wax on your eyelid this can easily be removed with some oil.
- Don’t reapply wax on the same section of the face right away this can cause the skin to graze.
- Don’t apply alcohol on the skin after waxing this may dry out the skin.
- Touch the skin consistently after waxing because this will make the skin break out.
- Don’t use heavily perfumed products on the skin.
- Don’t exfoliate the face or do any sort of chemical peels after waxing.
- Don’t use hot water to the area that has been waxed, try using cold water to cleanse the face.
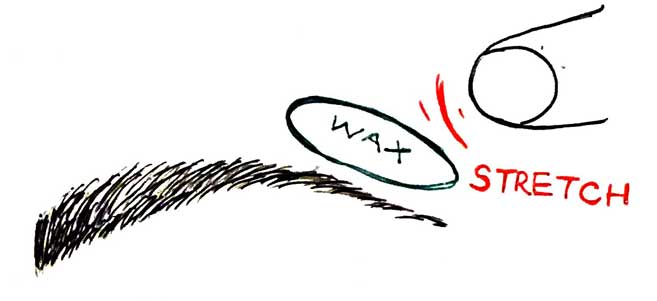
Where to stretch the skin when waxing the eyebrows:
When removing hair from the eyebrow area it’s really important to stretch certain areas of the skin to prevent any bruising or scarring. Stretching the skin during hair removal will help eliminate the pain.
When you apply the wax to the center, apply it according to hair growth. Once it’s time to remove the wax hold the middle top of the forehead and proceed to remove the hair in the opposite direction of hair growth.
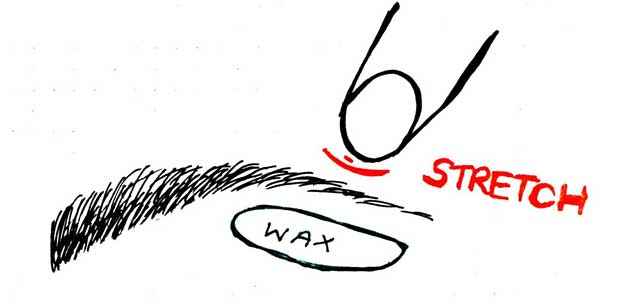
Right eyebrow on top: When the wax is applied to the top of the brow use your middle and index finger to stretch the top part of the eyebrow before removing the hair.
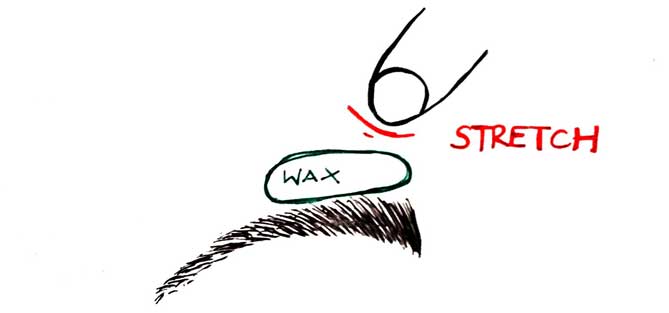
Right eyebrow on the top angle: Use one finger to stretch the angle to remove hair from the top right corner.

Right bottom of the eyebrow: Stretch the skin on the top of the right brow so that you can remove wax on the bottom beginning part of the eyebrow
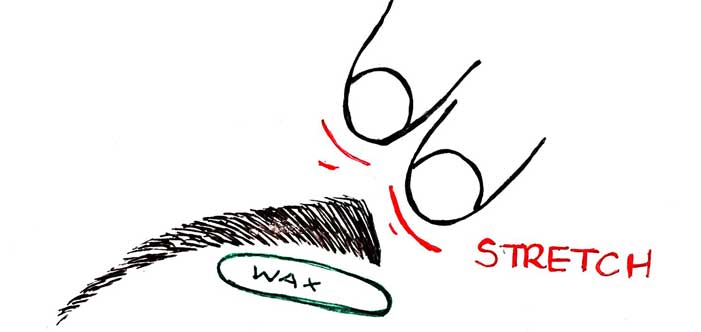
Right bottom Arch: In order to remove hair for an arch on the right eyebrow stretch the top right of the eyebrow.
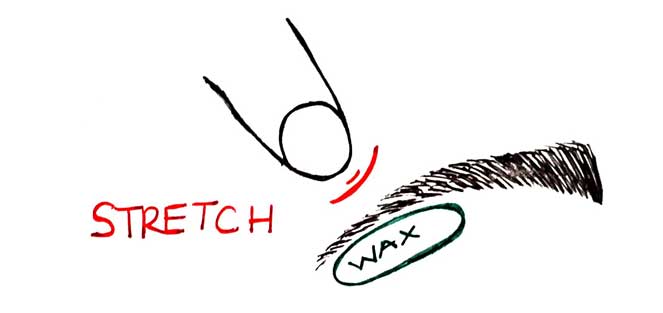
Left eyebrow on top: Use your middle finger and index finger to stretch the beginning of the eyebrow and then proceed to remove hair.
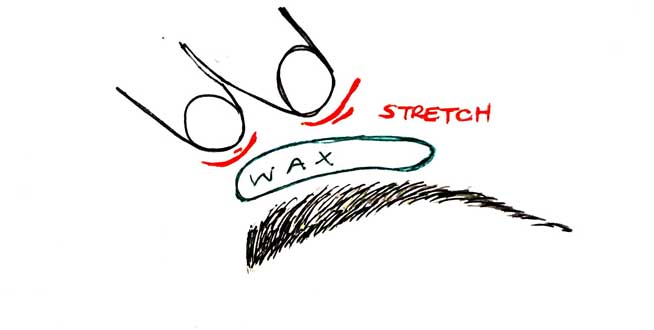
Left eyebrow on the top angle: Stretch the skin by placing your finger on the top of the eyebrow at an angle that should be on the top left corner.
Left bottom of eyebrow: Stretch the top of the left brow so that the skin lifts and your ability to remove the hair.
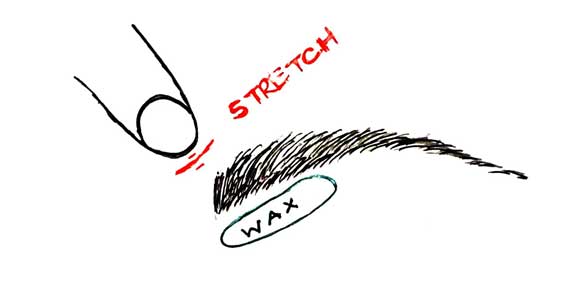
Left bottom arch: Stretch the top left part of the brow on an angle with your finger so that the hair removal can be removed at this angle.
Is It Better To Tweeze Or Wax The Eyebrows?
Tweezing is better for removing grown hairs, and also individual stray hairs, and the reason is that the tweezer can focus on the individual hair strands and be able to pluck them out.
Wax will remove all hairs such as all peach fuzz and hairs which the naked eye cant see. In my opinion, the best way to remove hair from the eyebrows is by waxing the eyebrows because it will give the brow an overall clean and defined look where as the tweezer will not be able to do that.
How Long Does It Take For Facial Hair To Grow After Waxing?
It usually takes approximately 4-6 weeks for your facial hair to grow back. Depending on how often you wax the hair it could take longer, you will find over time the hair will grow back thinner and eventually stop growing with long term use.
How Do You Treat Skin After Waxing?
When it comes to the aftercare of waxing there are a few things to keep in mind, the pores are now open because the hairs have been removed from the hair follicle.
It’s important to understand that the skin is more sensitive and if bacteria and germs get into the pores this will cause some breakouts. It’s important to soothe the skin with witch hazel after waxing. This will act as a natural antiseptic and clean out the pores and also will help soothe and condition the skin.
When cleansing the skin try using cold water instead of hot water because cold water will help close the pores. Do not apply any makeup on freshly waxed skin this can cause it to further breakout, Instead, keep the skin as clean as possible.
Don’t touch the face continuously with your hands because this can spread germs and bacteria into the pores causing your skin to break out.
Stay away from any spray tanning or swimming pools because this can cause makeup from getting inside of the pores which again can clog them causing the skin to break out.
Stay away from any perfume scented face washes and any harsh scrubs This can potentially irritate the waxed skin.